builderbill

cupboard fixing, the new bathroom cabinet.

Bathroom cupboard fixing is more or less the same as fixing kitchen cupboards with maybe an added complication of a sloping floor as I had in this case/


fitting bathroom cabinet plinth
Cupboard fixing - Fitting the cupboard plinth.

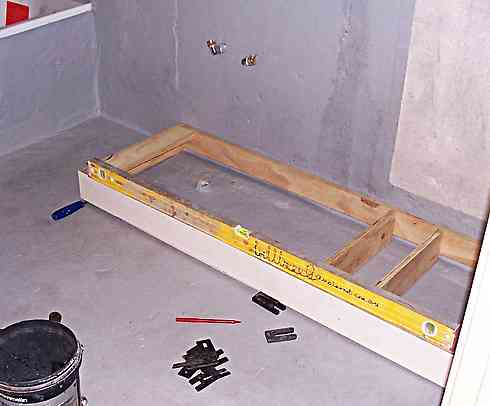
The cupboard had been made at a local joinery shop. Above is a shot of plinth for it, that has been laid in position. It has been packed up so that it is level.

  • As is common with these plinths the joiner has made the back rail of the plinth narrower, and so it was higher off the floor than the front and cross members. This is to make it easier fitting, as quite often there is a slight rise towards the wall.
  • The faces that are seen, the front and left hand side have been faced with laminate (counter top Formica) with the same colour as the cupboard itself.
  • This is to give it a hard wearing and kick resistant finish.
  • It is made out of plywood which is a good practice for any wet area as it is less prone to dampness damage than MDF material..
  • At the front left hand edge I have stuck a chisel under it and adjusted it so that the the plinth is level each way, front to back and side to side.
  • The maximum gap turned out to be about 16mm so I got a couple packers that measured 16mm and running them along the floor with a pencil on top I used them to scribe a pencil mark on the plinth that was 16mm up from the floor, all around the plinth.
  • Incidentally the black "U" things that you can see are plastic packers that I got from a window and door manufacturer. They come in different thicknesses and make it very easy to fix door jambs and windows etc.
  • I used them because I had them handy, but a bit of something else 16mm thick would have worked just as well.
  • I took the plinth outside and cut the waste off with my jigsaw and then finished off with my small buzzer. There was no need for extreme accuracy, as the tiles would cover any small gaps. I just had to sit solid and level.
fixing a bathroom cupboard
Cupboard fixing

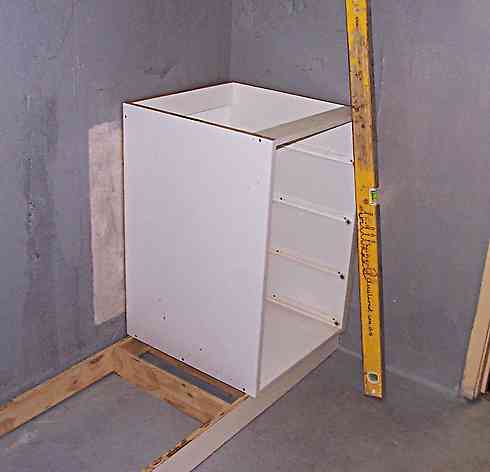
The cupboard was in two sections. Here I am just about to fix the right hand drawer section of the cupboard. It sat nicely against the wall so I put a couple of 50 x 8mm Dynabolts through the top back rail (not seen here) to fix it to the wall. No fixing to the bottom or side, not needed. I didn't fix the plinth in any way either, it just sat there. The tiles would lock it into position.

using a staff to mark the hole positions
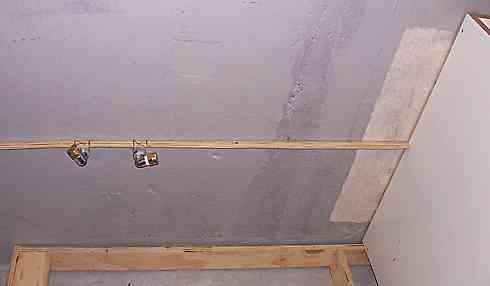
Cupboard fixing - Marking the hole positions using a scrap of timber as a staff or rod.

The next section of cupboard needed two holes in the back for the hot and cold water pipes, and one in the floor for the floor waste.

  • By far the best method of measuring for holes like this is to use a staff or staffs. Tape measures require memory or writing down sizes, staffs make everything clear to see.
  • A staff can be any scrap of timber that's long enough. (Here I am using the offcut or ply from the plinth. "Waste not want not""-)
  • I am marking the distance of the water taps here from the side of the fixed section of cupboard.
  • Then I turned the staff around and marked the height of them up from the top of the plinth.
  • Then I used the other side of the staff to mark the hole size and the position of the floor waste.
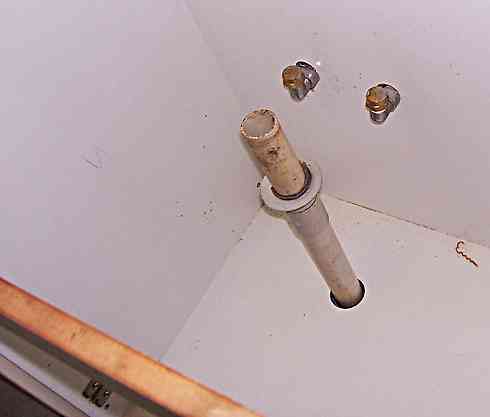
  • I cut the holes in the cabinet with hole saws that were a fair bit oversize, as to get them perfect is just not necessary, as cover flanges go on the waste and pipe fittings.
  • I had to turn the water off and remove the elbow fittings to slip the cupboard in place.
fitting the bathroom cabinet around the services
Cupboard fixing .

Here's the cabinet dropped into position, with the pipe cap ends back in place and the piece of old sink waste stuck in temporarily to stop anything dropping down the hole.

A couple of Dyna bolts to the wall, and a couple of screws to the already fixed drawer section fixed it solid

I laid on the top and fixed it with screws from underneath.

bathroom silicone seal to edge of cabinit top
Cupboard fixing - Silicone seal.

I ran a bead of wet area silicone around the top. This was maybe a bit of overkill, as there would be another silicone joint going in when the tiles had been fixed. BUT... it cost little to do, so why not?

bathroom renovation cabinet top protection
Cupboard fixing - Protecting the top of the cabinet.

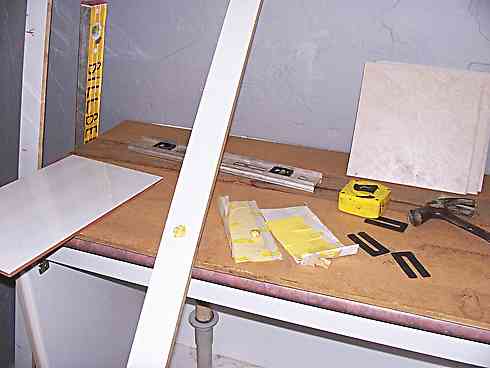
OK here is the cabinet in use. Not it's intended use, but unavoidably new bench tops and the like get used before the job is completed. I have always made a practice of covering up new surfaces until the very last minute. Accidents can and do happen, if there's a bench, the other trades use it or stand on it, so instead of whingeing every time I see the sparky standing on them I have got into the habit of always covering them up. A bit of cover ply, recycled carpet or in this case a bit of old 12mm MDF is good insurance. I stuck the MDF down to stop it sliding and possibly scratching the laminate. I used a couple of bits of that yellow stuff you can see, that is normally used to stick posters or notices upon walls.


If you didn't find exactly what you are looking for try this search tool that will search the site and the web.


coates hire
Hire Equipment
hafele
Furniture Fittings - Architectural Hardware - Electronic Locking Systems - Technical Hardware

BuilderBill sponsorship


Please Note! The information on this site is offered as a guide only!  When we are talking about areas where building regulations or safety regulations could exist,the information here could be wrong for your area.  It could be out of date!  Regulations breed faster than rabbits!
You must check your own local conditions.
Copyright © Bill Bradley 2007-2012. All rights reserved.
Page copy protected against web site content infringement by Copyscape