Concrete finishing.
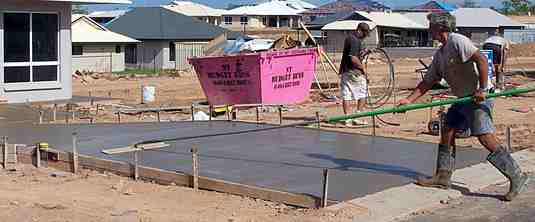
Concrete finishing Starts when the concrete has been placed in the forms, levelled and screeded. This means that on a job of a reasonable size, when an area has been poured, one or two men start on the finishing. It should not be delayed too long, depending on conditions of course you may have more or less time. For instance I am used to working in very hot conditions, and sometimes windy, so all other things being equal our concrete will start to go off sooner than in colder climates.
Bull float and Edging
 |
| Concrete finishing - Savvas with his bull float fully extended, pushing it away from him. The leading edge is slightly higher than the back. On the return stroke he lifts the nearside edge. |
As soon as the concrete in a fairly large section has been put down and screeded, the concrete finishing begins. This is known as the first float. The surface is worked with a float and edger. These three guys in the photograph emptied and spread a full 7cuM. truck load, before starting with the floating, but if it was a larger job, more men would be needed and one or two guys would drop back and start concrete finishing, while others carried on with the pouring. The timing is critical, leave the concrete finishing late and it will be so much harder.
 |
Concrete finishing - Another job and a wider bullfloat.
|
 |
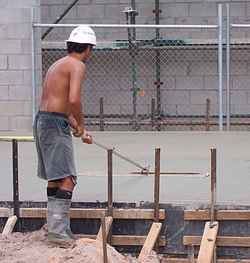
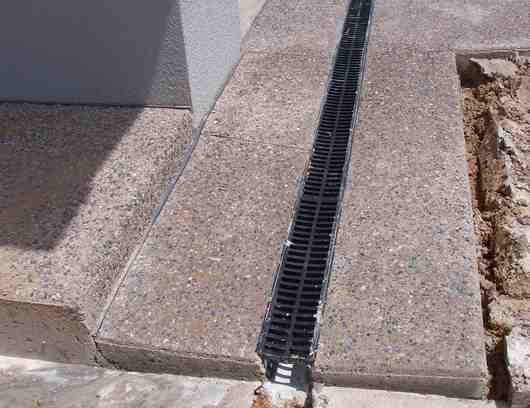
| Concrete finishing - Charley goes around the edges and small areas with his steel float and the edger, leaving the main part to the bull float. There is a small plastic type drain set into the concrete at this position, the orange plastic is to protect it. |
- The floating levels out the screed marks. It pushes down slightly the larger pieces of aggregate and brings to the surface a small layer of fines that the finish consists of.
- When using a bullfloat always try to work two ways across the surface, that is along the length, then across the width at right angles. The bullfloat takes out the ripples and imperfections left by the screed, then, going across the opposite way helps to even out those smaller imperfections left by the bullfloat itself.
- On a small paving job it is quite easy to do this stage with hand held wooden float about 300 long. Sometimes off a plank that is stretched over the concrete.
- I use what looks like an aluminium float, but is in fact magnesium, but even a home made wooded one will work. A steel float used too soon tends to bring more water to the surface than you need .
- The bull float does this job a lot easier of course. It has a small pivoted connection from the handle to the blade, so that when the handle is twisted the blade lifts up at the leading edge.
- The bull floats that I see on jobs all the time, are aluminium blades up to about 1200 wide, with an extensible handle, and they are fairly expensive.
- Definitely too expensive to buy for a one off job, but the good news is that if you are only doing a few square meters, it is easy to make a wooden one very cheaply that does the same job.
- The floating goes completely over the control joints. They have a small 3mm or so strip that gets pulled off when the concrete is hard enough to walk on, leaving a nice sharp looking edge.
- While the bull floating is going on another guy goes around the edges with an edging tool that forms a curved edge.
- Again the edging tools (and jointing tools) range from very basic hardware store items that do a good enough job, to full on professional tool that again can be fixed to an extensible aluminium handle to allow reaching across wide slabs.
- When the floating is happening the surface of the concrete will take on a moist shine. If the concrete was fairly wet to start with, then it is quite possible that bleed water will rise to the surface.
- You must try to get rid of this water, either by sponging off or sometimes it is possible to stretch a garden hose across from side to side and slowly drape the excess water to one side with it.
That is it for the first and hardest part of the job. The initial floating is finished. The pros clean their tools, and sit down and have a rest for a couple of hours or so. The next stage is the final finish, and whatever finish it is going to be, it does not start until the watery shine has gone off the face of the concrete and touching it only leaves a small indentation.
I can't give any particular time to wait, because conditions vary. For instance, with the job illustrated the main driveway is in the sun, that will "go off" quicker than the footpath in the shade. If a breeze is blowing, same thing, faster drying.
- A lot of amateur concrete pours don't get past this stage, after a hard strenuous job the volunteer labour is ready for a few beers and they get stuck into it.
- Again, if you have the concrete in flat and level, resist the temptation to play about with it. You won't improve it any by working over it with a steel float if it is not ready.
The final finish.
When the concrete is ready to do the final finish you have a few options.
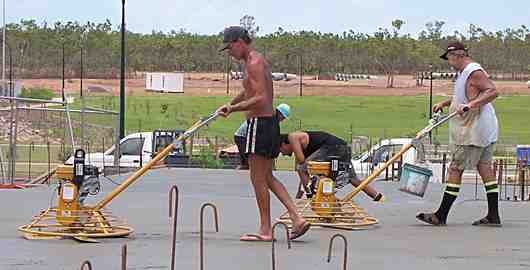 |
| Concrete finishing - A couple of power floats or "helicopters" on a larger slab. Note that the guys have taken off their gum boots and put on smooth soled sandals or thongs, as the surface is still fairly soft and heavy footprints will show up at this stage. |
When the shine has gone off the surface, that is the bleed water has dried up, and it is firming up enough that it will support the pressure of a steel float without it digging in is the time to start the final finish. The time gap between the finishing the bullfloat work and starting the final steel float varies from job to job of course.
- Work over it with a steel float to give a harder, smoother and denser finish.
- Using a steel float, and this applies to power floats (helicopters) as well, when the surface is wetter you work in broad sweeps with the leading edge of the float lifted a few mm.
- As the concrete gets harder you go over it again with the float almost flat to give it the final finish.
- That could be it, done. Or from that you could go on to give the surface a broom or a sponge finish.
- Broom or sponge is done to walkways and footpaths, and is seen as easy and rough finish, but the point is, for it to look good, the surface should be good before the broom or sponge is used.
- Sure a broom or sponge can cover up small imperfections, but that's it. Get it right with the steel float first.
The driveway job that I have pictured was done with an exposed aggregate finish.
 |
| Concrete finishing - The maximum size aggregate here is 10mm, which seems to be about the most common. Any coarser is harder to clean and looks a lot rougher. Just my opinion of course, I know one owner who loves his 20mm finish (he is hardly in a position to change it now)! |
- When the surface was only just hard enough to walk on the guys sprayed the surface with a retarder solution.
- I have used commercial retardants in the past to do the job, but someone has worked out that sugar works just as well. Two kilos of sugar mixed in a garden type spray does the job.
- Shortly after, they work over the surface with a 3000psi pressure cleaner, keeping the fan wide and well away from the surface.
- At the same time a guy will be using a stiff bristle broom to also work over the surface.