|
|
|||||||||||||||||||||
String line and Plumb Bob
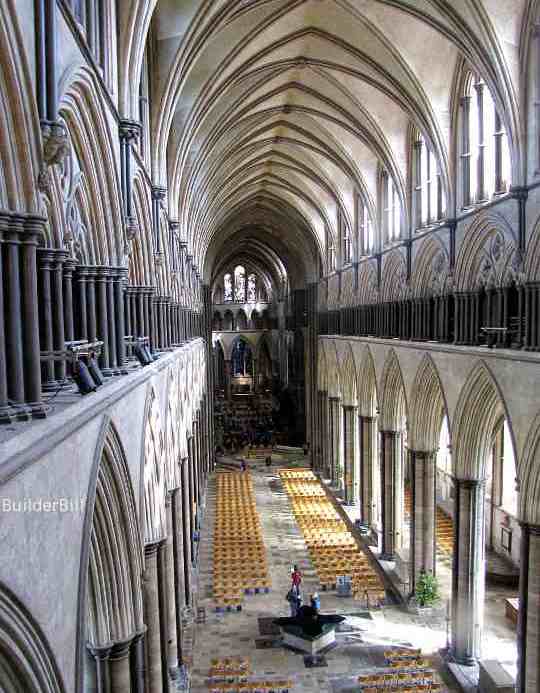
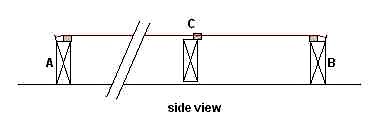
If you have come here without seeing my hand tools page then check out the intro to string lines first. So, you have had a good look at the photo above and you are probably wondering what it has it got to do with the subject? . Why take up so much space anyway? I was coming to the end of a long job a while ago, and the owner brought inside his latest toy. A small battery operated laser level, complete with tripod, "cheap at $350". It could project a red beam of light either horizontally or vertically onto the surfaces of his walls, when set up indoors. I asked John what he was going to use it for, expecting something esoteric to say the least. "Levelling my kitchen cupboards" he said. To the best of my knowledge his kitchen cupboards look no different after using the laser than they would if he had used a spirit level (which he already had). With his spirit level he would have had no set-up time, no dodging the tripod himself or with his power leads, no changing from horizontal to vertical, no charging batteries. So what I am trying to say here is that when you are looking at all the wonderful new gizmos in the hardware store, resist the urge to buy, and consider if you can do it with something simpler and cheaper. The methods on this page have been used for centuries. They didn't have laser levels and computerised theodolites when they built the Gothic cathedrals in Europe like the magnificent example shown on this page, built nine hundred years ago. String LineA line is described by two points, the start point and the end point, and the shortest distance between two points is a straight line. A carpenter or a mason uses a string line between two points (nails or line blocks etc.) and he pulls the line tight to get it the shortest distance, to make it straight, with no sag. A carpenter can get accurate readings on a string line, by using three small packers, all the same thickness, say 20mm. He stretches his line between two end points that are fixed first. Then he puts a packer under each end to give the line clearance.
Using a line with an offset
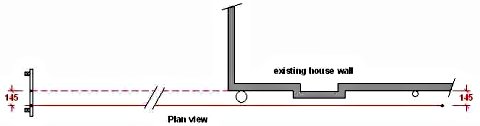
One a similar vein, sometimes when you have to get machinery into a job, rather than pull out the profiles that are in his way, first set up some offset or recovery profiles. Say you set the recovery profile 6M away from the real one, then it is a case of a simple 6M measurement offset to get back to the original set out, rather than starting from scratch again, squaring etc. Plumb Bob, Plumb levelsNOTE.
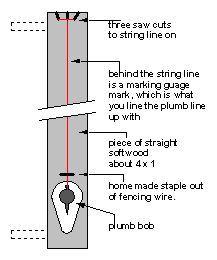
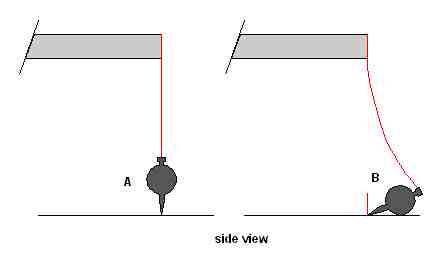
I can remember making one of these plumb levels for a brickie when I was about sixteen. (He must have been an old die hard not into the new stuff). It is just a straight piece of timber with a hole cut in the bottom where a brass plumb bob swings. Usually about 1200 long (4 ft.) To use it you rock it slowly towards you until the bob swings free and back slowly until it rests again. Do this a couple of times and it steadies the swing and gives a true reading quite quickly. I am not saying let's start using these again, no way. But what I am saying is that sometimes old methods are quite adequate for one off jobs. I have made up and used timber plumb levels on a few occasions. When I was fixing column formwork it was common for one guy to climb say three metres up a form, nail a stick of wood on the top, hang a plumb bob off the stick and measure into the ply from the line and say "183". His mate would measure the bottom and say something like "197". "that's er.......14 this way". Then invariably "Hang on......, not that way, the other way" and he'd back off and then push the opposite prop until they had it right.
I made up a plumb level with a couple of bits of timber screwed to it (shown as dotted lines in sketch), that made it a lot easier, no climbing. The reason for all the messing about with plumb bobs etc. was that the formwork was never exact on the outside where you could use a spirit level , so a spirit level would give a wrong reading. There were odd sizes of column clamps, rough sawn or bent timber, etc. I once also made up something similar for concrete walls that were narrower at the top than the bottom. At the risk of being called an old fart, here is a sketch of a mason's level that would have been standard equipment on any of the old cathedrals. It is the same as above with a cross piece added. Simple technology used for creating incredibly complex work. Transferring a vertical point or edge.
Let's say that I have a first floor landing that I want to plumb down to the floor below so that I can start measuring up and setting out a flight of stairs.
Another Old Fart Digression
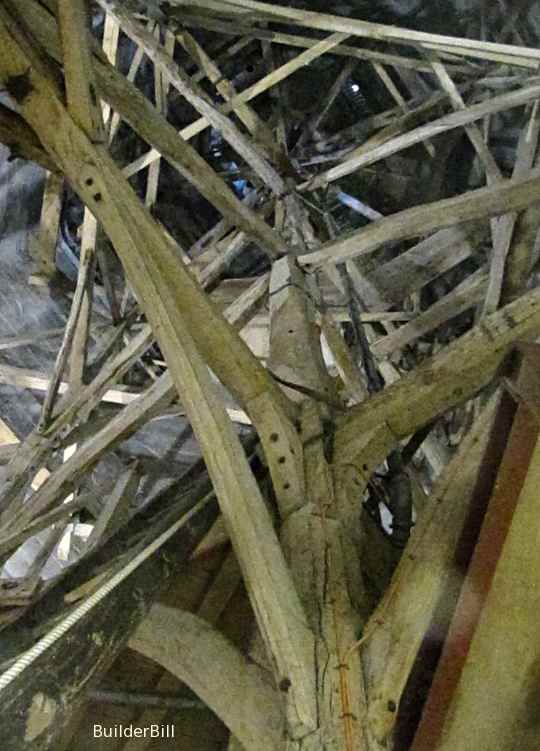
I visited Salisbury Cathedral, many years ago and stood directly under the centre of the cathedral's spire. It is of partly hollow stone construction, and towered over me for 404 ft. It was one of the tallest buildings in the world at the time it was built. I couldn't see the insides of the spire, there are beautiful arched ceiling overhead, but I was blown away by the incredible upward reaching space around me, with the slender columns transforming into Gothic arched stone ceilings. What made what I was looking up at almost inconceivable, was that I knew that the tower and spire was added in 1330, a generation after the main building was finished. All 6400 tonnes of it sitting on four stone columns. These sat on, by modern standards, poor foundations. In 1668 Sir Christopher Wren surveyed the spire and found that it had taken on a twenty nine and a half inch lean. He designed stone bracing between the support columns and a series of iron tie rods etc. to fix it.
In the case of the spire of Salisbury, the masons were fully aware of the problems presented by the structure they were going to build.
All this was done by a workforce that apart from one or two, was totally illiterate. In a time before universities and professors of engineering. In a time before, dare I say it, $350 laser levels.
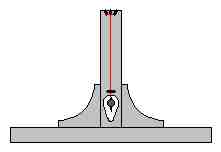
So looking at this shot you may be prompted to ask how the heck they got the centre point with that lot in the way. Easy peasy, the rope at the side gives a clue. It is fixed to a pulley up near the top that allows the rope to hang between the obstacles.
leave string line and back to hand tools Not found it yet? Try this FAST SITE SEARCH or the whole web |
Hire Equipment Furniture Fittings - Architectural Hardware - Electronic Locking Systems - Technical Hardware BuilderBill sponsorship Other Pages.
|
||||||||||||||||||||
|
|
|||||||||||||||||||||
|
Please Note! The information on this site is offered as a guide only! When we are talking about areas where building regulations or safety regulations could exist,the information here could be wrong for your area. It could be out of date! Regulations breed faster than rabbits! You must check your own local conditions. Copyright © Bill Bradley 2007-2012. All rights reserved. |
|||||||||||||||||||||