|
|
|||||||||||
Setting Planer BladesSetting planer blades is a fiddly job, but if you take your time it is not all that hard to get it right. This way of setting the blades was taught to me when I was an apprentice using a planer / surfacer that was seven foot long with a 24 inch wide three blade head. It works just the same with a small hand planer . I have called the two surfaces of the planer, tables. The in feed table and the out feed table. The out feed table is fixed. The in feed table is the one that adjusts to the depth of cut. The blades are set fractionally above the out feed table. If you have the blades too high they will leave a scoop in the end of the timber. If they are lower, the plane won't work. I like to have my blades a touch higher than recommended. It gives a more positive feel to the cut and allows for the blades to wear a bit. Mostly I do pretty rough stuff, framing timbers etc. When I fit doors I always finish off with a hand plane to remove the buzzer marks anyway, so a little scoop at the end is no problem. To change the planer blades, pull the power plug out, take out the old ones and give all the surfaces a good clean and dust, wipe with an oily rag etc. Put the new planer blades back in at a guess for height and nip them up just enough to hold them firm, but still allow you to adjust them up and down with the adjusting screws. Set both tables level. Roughly, no big need to be fussy. What you need. A pencil and a piece of scrap. Your blade changing tool/spanner and a screwdriver.
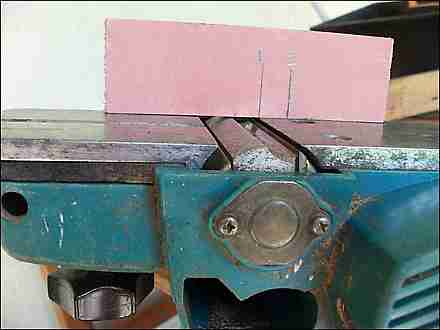
Rotate the blade out of the way, get a small length of wood, This is a bit of 12mm by 40mm I am using. Put two pencil marks on it, say 15mm apart. Put mark 1 level with the edge of the out feed table.
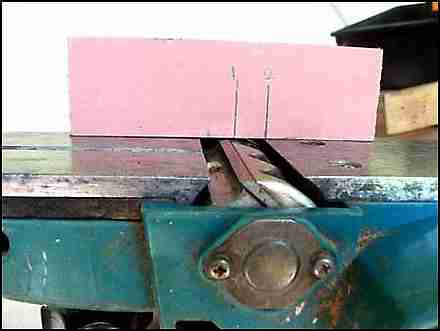
Rotate the blade (use a finger on the rubber drive band if it's easy to reach) so that it advances and catches the timber and carries it along for a space. That space is your guide. Adjust the blade and try again until your marks are like the photo above. If your pencil marks are like these here about 15mm apart you have your blade set about one millimeter higher than your fixed out feed table. Go for less if you are doing fine joinery with your planer.
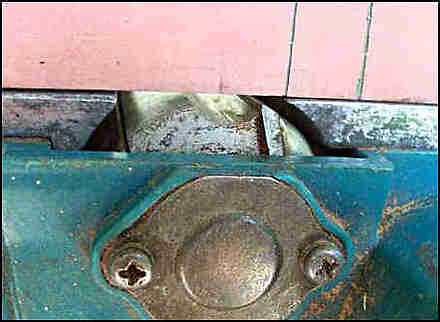
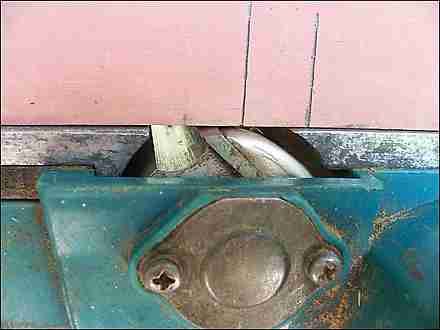
So you move to the front edge of the machine and do the same.
Here you can see that I need to lift this end of the blade up a bit. The right hand mark has not quite come up to the edge of the out feed table. As I said, it takes time, but you can get both blades set perfectly. This method takes a very small vertical distance and converts it to a lot longer horizontal distance that is easy to see. I used to have a small combination bench saw and planer, that ran off household power. Just small enough to take on site and it was really useful. The planer was about 450mm long and about 150 wide blades. It should have been great, but the method of changing the blades was appalling. Tiny Allen screws. The hole and screw sockets always filled up with gunk, they took ages to get clear every time the blades needed changing. It was so bad that I hardly ever used the planer side of the machine. If you are buying new, make sure the blade changing system is easy to use. The Makita ones I use have a small box spanner that comes in the kit, but I could just as easily use a generic socket or ring spanner If I lose the correct tool. Adjustment up and down is with an ordinary Phillips head screwdriver. Easy. Not found it yet? Try this FAST SITE SEARCH or the whole web |
Hire Equipment Furniture Fittings - Architectural Hardware - Electronic Locking Systems - Technical Hardware BuilderBill sponsorship Power tool related pages
|
||||||||||
|
|
|||||||||||
|
Please Note! The information on this site is offered as a guide only! When we are talking about areas where building regulations or safety regulations could exist,the information here could be wrong for your area. It could be out of date! Regulations breed faster than rabbits! You must check your own local conditions. Copyright © Bill Bradley 2007-2012. All rights reserved. |
|||||||||||