|
|
|||||||||||||||||||||||||||
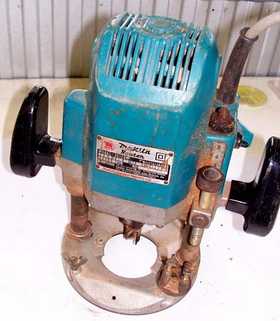
Wood Router, Laminate Trimmer and JigsThe modern portable router has completely taken over from the hand tool that it has replaced. Do they still make hand ones? I doubt it. The original hand one was used purely for cleaning up the bottom of a slot or recess that had been mainly cut out by saw, drill and chisel. The modern machine can cut slots, grooves and recesses with ease, but it can also do a lot more. As far as joinery work goes, many a small joinery shop and amateur woodworker can, with one of the larger size plunge routers now available, do just about any job that used to be done on a spindle moulder. Used mounted upside down in a bench they are in fact a small spindle moulder. A very versatile tool.
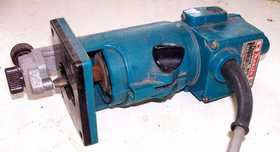
Laminate trimmers do the specific job of trimming laminate on counter tops etc. Which can of course be done with a standard router. The trimmers are smaller, neater and easier to use. They can of course be used for other work too. I have used this one with a home made jig for recessing door hinges.Cutting the recess for locks etc. For this sort of work they are so much more convenient than the larger routers. A plunge router has the base of the machine set on two spring loaded sliding posts. This allows for the cutter to retract inside the base for safety, and also for checking the settings easily before starting the machine. The depth of cut is set by an adjustable stop. Just about all machines in the size range of the Makita shown come with quite a few accessories.
Of course that is only the beginning of the accessory game, there are heaps of accessories on the market that make the humble rout into as I said before, "the most versatile tool in the shop". When doing deep cuts it is advisable for the cuts to be done in stages. So if you had to go say 24mm deep you would do it in say three 8mm stages. To make this easier there is a swivel base to the depth stop that allows three separate settings to be used with the plunge depth stop.
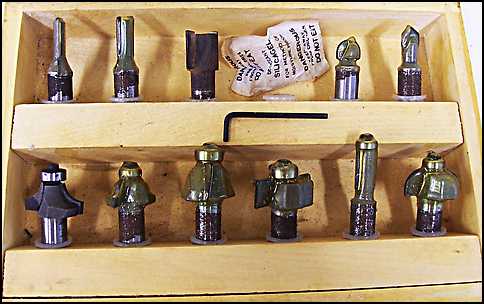
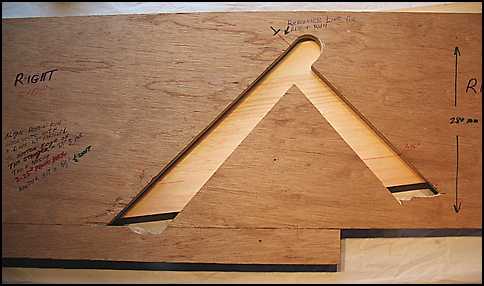
The variety of cutters available is extensive. From basic HSS (High speed steel,rarely seen now) to TCT (tungsten carbide tipped) shaped or flat cutters, with or without ball bearing roller guides. The ball bearing guides contact the work and allow the cut to be done by rolling along an edge and cutting a profile on that edge. But for the ball bearing, the cutter would leave burn marks on the timber. In fact you can still gets touches of that happening if the bearing gets clogged with laminate glue and starts sticking. Routers not only handle timber with ease, but using TCT cutters they can also handle a wide variety of plastics and laminates. Used with various jigs, fences and guides they can do repeatable and accurate work. Wood Router JigsHere photographs and details of a wood router jig, sent to me by Jack Churchill who lives in Connecticut USA. Thanks for this Jack, much appreciated. If you have come here from the power tools page, here is a link to a page specifically on this jig that shows what it is used for.
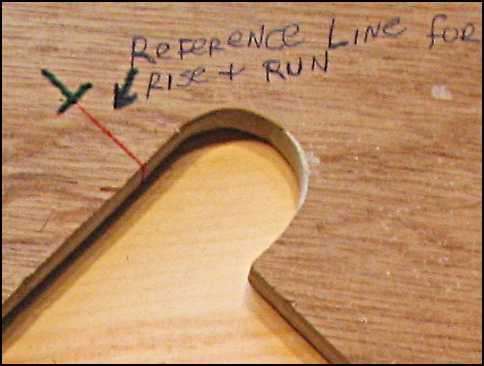
As you can see it is made out of a piece of about 1/2" ply. There is another piece glued to the bottom edge to stop the triangle bit from breaking off. Jack has written on the jig.
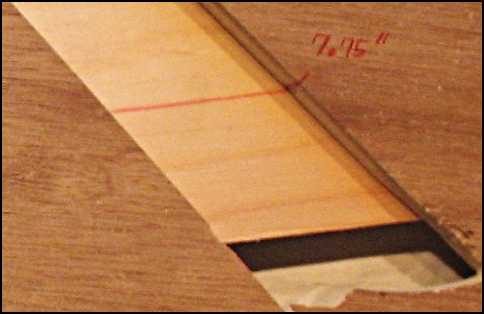
The photo above shows the jig with a 7.75" rise mark on it, lined up to the line he has already drawn 1.5" up from the bottom of the stringer. A similar mark for a 10" tread is lined up also and the jig is clamped down and the router is used.
Using this jig Jack can cut a variety of stairs, just by altering the pencil marks for his rise and tread, or he can just lay it on top of a set out that he has marked out with his steel square. With all jigs, the accuracy of the finished work depends entirely on the quality of the jig. Make a rough jig, you'll get a rough job. You can see that Jack has spent a bit of time getting this right. The time spent is making a jig is very rarely wasted.
Here is my Makita set up with the jig collar. This one is suited for a half inch bit. From this you can see that the actual timber jig has to be made slightly oversize to allow for the thickness of the jig collar and it's clearance . The collar sits 8mm up from the base of the router, so 10 or 12mm ply would be fine for this set up.
Here is another shot of the same set up, showing the two screws holding it in place. A home made table for planing MDF panels straight.
Most of the work I do with my wood router these days is the ends of wardrobes or bookcases, straight cuts, so I don't use this collar. Instead I just use straight pieces of timber and run off the edge of the router base itself. When I made up some wardrobes out of MDF I used a home made saw bench the cut sheets were OK, but not perfect. So in a similar vein I fixed my router to an off cut of plain 16mm MDF board, and made myself a home made router table. I am not at this stage in the business of making any permanent jigs, so it was a quick job. I screwed the router down via what is normally the fence holder, with a couple of roofing washers and plumbers pipe clips. Anything is OK as long as it is solid and doesn't damage the machine. I used the largest TCT cutter that I have, which was 28mm. Because I was in effect wanting to straighten 2400 (8ft.) sheets, I didn't see any point in using a short fence setup. What I was making was in effect a poor man's spindle moulder, and spindle moulders have decent long fences and in feed tables. You can see that the whole fence setup is at least 3M long, with it being longer on the in feed side. I used a couple of bits of aluminium for the fences, screwed and clamped down to the MDF board. I could have used timber just as easily. The important thing was getting them both in line, with an offset on the in feed side for the depth of cut. The main photo shows me using a long aluminium straight edge to do this. Again I could just as easily used a string line to get them straight. I used a couple of plastic spacers about 2mm thick to set the offset. After a couple of trials on scrap material it was giving me straight square edges that I could happily glue my edge strips to. If you have only a couple of edges to straighten, don't bother with a set up like this, but just clamp a straight edge directly to your panel, with the distance from the edge of the router to the cutter, less the depth of cut as your offset. This is the easiest way, but as soon as you have a few sheets to do of varying sizes, the temporary home made router bench is an easy low cost solution. Check out this page if you have to work with MDF. Check out this page on wood router, jigs, and patterns etc from Jim who really does do some fine woodworking. Not found it yet? Try this FAST SITE SEARCH or the whole web |
Hire Equipment Furniture Fittings - Architectural Hardware - Electronic Locking Systems - Technical Hardware BuilderBill sponsorship Power tool related pages
|
||||||||||||||||||||||||||
|
|
|||||||||||||||||||||||||||
|
Please Note! The information on this site is offered as a guide only! When we are talking about areas where building regulations or safety regulations could exist,the information here could be wrong for your area. It could be out of date! Regulations breed faster than rabbits! You must check your own local conditions. Copyright © Bill Bradley 2007-2012. All rights reserved. |
|||||||||||||||||||||||||||