|
|
||||||||||||||||||||||||
Adding an hexagonal roof to an existing gable roof.
What prompted me to write this page was a question from one of my readers, Sherry who lives in Canada. Here's what she wrote. "My spouse and I would like a hexagonal room at the back left hand corner of our log home.We are having troubles as to how you combine a hexagonal roof with a basic hip style roof. We would prefer to be able to walk in to the room instead of having a detached round room. Hope I explained well enough! Thanks hope to hear from you". General design thoughts.I have done something similar, with an elevated octagonal verandah, but that had a short connecting passage to the house.
The additions to the house that I have drawn here, with the new room fixed directly to the house:-
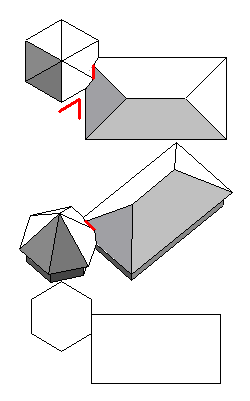
Option "A"I have drawn these sketches all with the same roofing angles, the main hip roof is at 45 degrees and the hexagonal roof is at 55 deg. I thought that this one could be OK, with one of the walls in the new room sharing part of the main house external wall. Almost straight away I didn't like it.
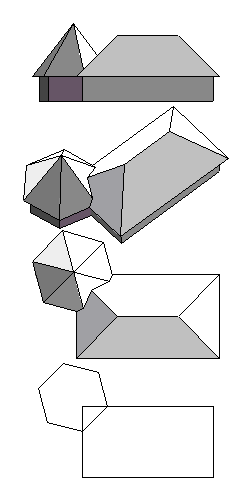
Options "B" and "C"
Both of these version are similar and I guess I like the symmetrical one best, but the main reason for showing both of them is that if the one on the right is rotated clockwise it would give another option, with the longer join on the back of the house. So you have in effect three positions here that the new room could be placed. Any one of which may fit in with existing windows or doors, better than the other two.
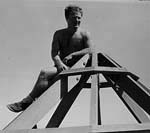
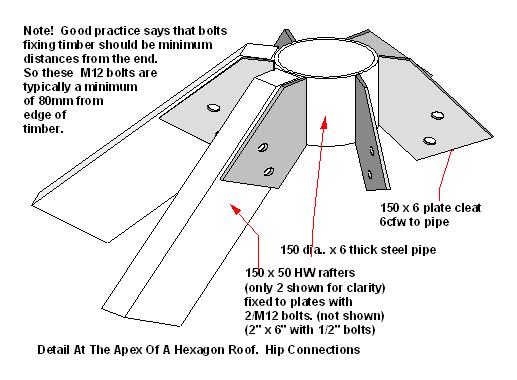
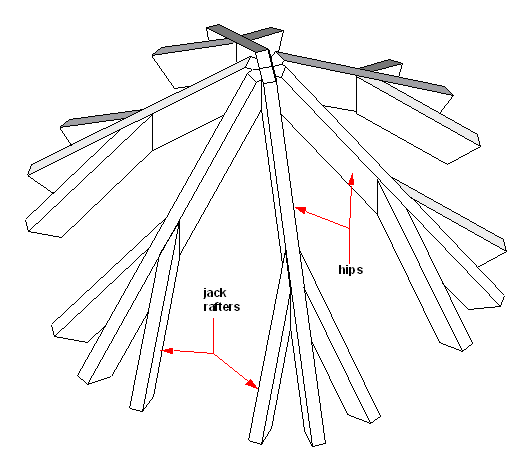
A couple of general details applicable to all pyramid style roofsAt the right is a shot of me with a lot more hair and a lot less waistline than I am currently sporting. Happy days. So what we are looking at are the hips meeting at the apex of the roof. You can see the bolts in the hips that are fixing them to a simple steel bracket to hold them all together. You may say to yourself that a steel fitment like this is a bit of overkill. What's wrong with nails? My answer to that is that this roof is still alive and well, doing the same job it was built to do. Not like 95% of the roofs around it that got wiped out by Cyclone Tracy.
The cleats for the hips are offset of course, half the thickness of the hip. With the five at the top, there is not a lot of room to put in another six full length common rafters. Apart from using a lot larger pipe and more cleats, the best way is to arrange the rafter set out to have two jack rafters on either side of the center line of each roof surface.
OK so if you don't use a steel bracket at the top, because in fact a roof like this, unless it is so tall that it is starting to look like a steeple, is inherently very stable. It is self bracing. So if I was pitching one of these here's what I might do:-
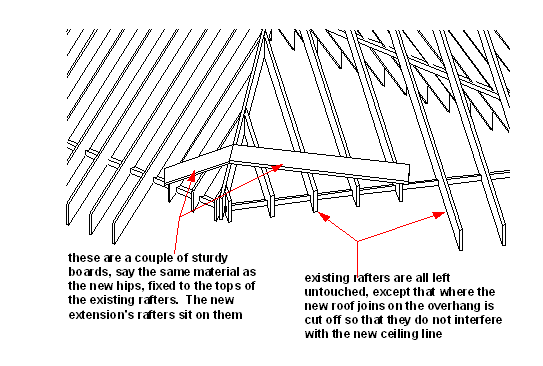
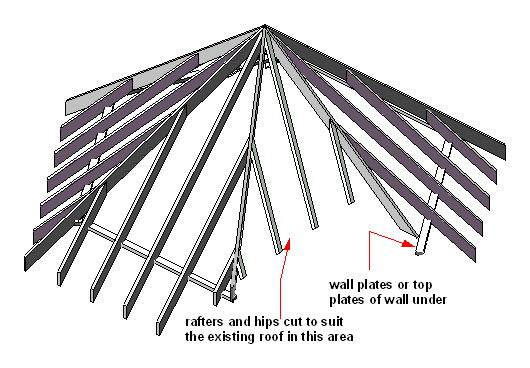
Remember that the strength of a pitched roof is directly related to the quality of the carpentry. Well fitting joints make for a stiff roof, and this is more so with one of these the taller it gets. Connecting to the existing roof. Using Option "C" as an example.
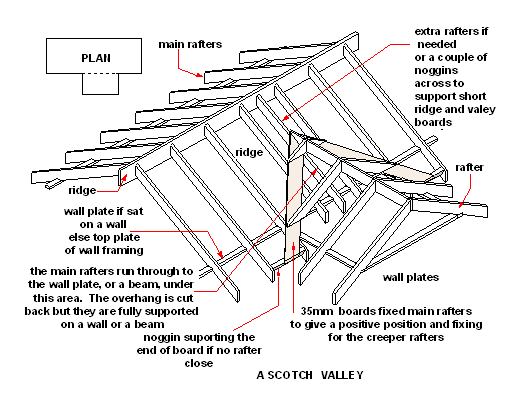
Here is a sketch of the new roof framing. The joined surfaces will form what we call scotch valleys. I have done a sketch of a more conventional one below. A scotch valley
In the layout sketches I have drawn an existing roof that is at 45 deg. pitch, and the new addition at 55 deg. pitch. I didn't do this for any particular reason, they could have been both the same or a lot more different. It is purely a matter of choice and what looks good and works well on one house may look different on another. However when you are making the decisions for a job like this, there are a few other things that affect the final look of the house. I have done another page on odd shaped and different angled roofs here. Not found it yet? Try this FAST SITE SEARCH or the whole web |
Hire Equipment Furniture Fittings - Architectural Hardware - Electronic Locking Systems - Technical Hardware BuilderBill sponsorship Quick Illustrated Roofing Glossary Pages.Types of roofsRoof Features Roof Framing Roof Trusses Roof Coverings In Depth Roofing Articles
|
|||||||||||||||||||||||
|
|
||||||||||||||||||||||||
|
Please Note! The information on this site is offered as a guide only! When we are talking about areas where building regulations or safety regulations could exist,the information here could be wrong for your area. It could be out of date! Regulations breed faster than rabbits! You must check your own local conditions. Copyright © Bill Bradley 2007-2012. All rights reserved. |
||||||||||||||||||||||||